Learn GSM Tips, Fix Software Issue, Tutorials and Guides To Solve GSM Problems.
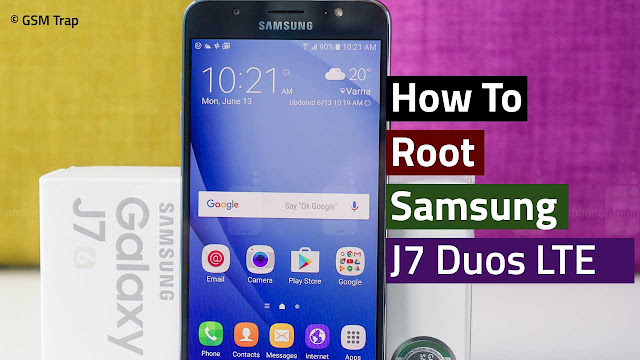
On this post, You will find Link to Download Samsung Galaxy J7 SM-J700F Marshmallow 6.0.1 Root File. Also, you will get How-to Manual for rooting Samsung Galaxy J7 SM-J700F Marshmallow 6.0.1.
Root Samsung SM-J700F Galaxy J7 Duos LTE Android 6.0.1
How To Root Samsung SM-J700F Galaxy J7 Duos LTE Android 6.0.1

Warning! However, files that we provide on this website are 100% tested. We are not responsible for any kind of Data Loss, Damage & Bricked Phone. Do it at your Own Risk.
Before going to rooting process Please back up important your data and Enable OEM Unlock.

Steps To Enabling OEM Unlock

Go to Settings-About Device-Software Information and tap Build Number for more than 7 times until Developer Options is enabled message pop up. Then go to developer options and enable OEM Unlock and USB debugging.

How To Root Samsung Galaxy J7 SM-J700F Marshmallow 6.0

Samsung Galaxy J7 SM-J700F comes with the latest Version of Android 6.0.1 Marshmallow. While rooting Android Marshmallow is a bit hard and risky but without rooting, it is impossible to Unlock Samsung Galaxy J7 Core SM-J700F. So here are the latest & safe methods to Root Galaxy J7 Duos LTE J700F.

This root file even works on Android 5.1.1 Lollipop.
Step #1- Download CF-Auto-Root-j7elte-j7eltexx-smj700f.zip & extract it in your pc.
Step #2- Now turn off your Samsung Galaxy SM-J700F and boot it into Download Mode. Press and hold "Volume Down" + "Home Button" + "Power Button" same time and release it when the blue screen appears. Again press "Volume Up" button. Now you will see Blue screen with the exclamation sign.
Step #3- Launch Odin3-v3.10.6.exe as administrator and connect your Samsung Galaxy SM-J700F to your PC using Micro USB Cable.
Step #4- Once your device is detected ID:COM port will highlight blue and you will get Added!! message in the log window as shown in the picture below.
Blue Highlight & Added!! Message on Odin
Blue Highlight & Added!! Message on Odin
Step #5- Click AP button and select CF-Auto-Root-j7elte-j7eltexx-smj700f.tar.md5 file that you've downloaded.
Step #6- Now click the Start button. As soon as the flashing finish your Galaxy J700F will start rooting process and reboot into normal mode.
Step #7- Done! First boot will take time to boot just be patient.

Final Words

So above was step by step guide on How to root your Galaxy J700F Galaxy J7 Duos LTE Android 6.0.1 without downgrading firmware. If you have any kind of problem during the process. Then, Feel free to share your problems & Opinions via discussion box below, and don't forget to share this on social networks if you find it helpful.
Learn GSM Tips, Fix Software Issue, Tutorials and Guides To Solve GSM Problems.
On this post, You will find Link to Download Samsung Galaxy J2 Prime, J2 Ace & Grand Prime + (SM-G532G/F/M) Lollipop 6.0 Root File. Also, you will get How-to Manual for rooting Samsung Galaxy J2 Prime, J2 Ace & Grand Prime + (SM-G532G/F/M) Lollipop 6.0.
Root Samsung Galaxy J2 Prime, J2  Ace & Grand Prime +
Root Samsung Galaxy J2 Prime, J2  Ace & Grand Prime + TWRP
Warning! However, files that we provide on this website are 100% tested. We are not responsible for any kind of Data Loss, Damage & Bricked Phone. Do it at your Own Risk.
Before going to rooting process Please back up important your data and Enable OEM Unlock.

Steps To Enabling OEM Unlock

Go to Settings-About Device-Software Information and tap Build Number for more than 7 times until Developer Options is enabled message pop up. Then go to developer options and enable OEM Unlock and USB debugging.

How To Root Samsung Galaxy J2 Prime, J2 Ace & Grand Prime + (SM-G532G/F/M).

Samsung Galaxy J2 Prime, J2 Ace & Grand Prime + (SM-G532G/F/M) comes with the latest Version of Android 6.0 Lollipop. While rooting Android Lollipop is a bit hard and risky but without rooting, it is impossible to Unlock Samsung Galaxy J2 Prime, J2 Ace & Grand Prime + (SM-G532G/F/M) . So here is the Latest & Safe Methods to Root Samsung Galaxy J2 Prime, J2 Ace & Grand Prime +.

Step #1- Download Samsung J2 Prime Root.zip & extract it to your pc.
Step #2- Now turn off your Samsung Galaxy SM-G532G/F/M and boot it into Download Mode. Press and hold "Volume Down" + "Home Button" + "Power Button" same time and release it when the blue screen appears. Again press "Volume Up" button. Now you will see Blue screen with the exclamation sign.
Step #3- Launch Odin3.exe as administrator and connect your Samsung Galaxy SM-G532G/F/M to your PC using Micro USB Cable.
Step #4- Once your device is detected ID:COM port will highlight blue and you will get Added!! message in the log window as shown in the picture below.
Blue Highlight & Added!! Message on Odin
Blue Highlight & Added!! Message on Odin
Step #5- Click AP button and select recovery.tar.md5 file that you got from J2 Prime Root.zip.
Step #6- Now click the Start button.
Step #7- Once the flashing procedure, finished Copy UPDATE-SuperSU-v2.76-20160630161323.zip into SD-Card & insert it into you J2 Prime or Grand Prime Plus
Step #8- Then reboot your Galaxy SM-G532G/F/M into recovery mode. Press & hold "Volume Up" + "Home Button" + "Power Button" same time to boot into recovery mode.
Step #9- Then flash UPDATE-SuperSU-v2.76-20160630161323.zip using TWRP Recovery.
Step #10- Once the UPDATE-SuperSU-v2.76-20160630161323.zip flashing is completed. Reboot your device into normal mode.
Step #11- Done! First boot will take time to boot just be patient.
Samsung J2 Prime Root.zip

Final Words

So above was step by step guide on How to root your Galaxy G532G/F/M 6.0 Lollipop without downgrading firmware. You won't be asked for any password after rooting your J2 Prime, J2 Ace & Grand Prime Plus If you have any kind of problem during the process. Then, Feel free to share your problems & Opinions via discussion box below, and don't forget to share this on social networks if you find it helpful.
Learn GSM Tips, Fix Software Issue, Tutorials and Guides To Solve GSM Problems.
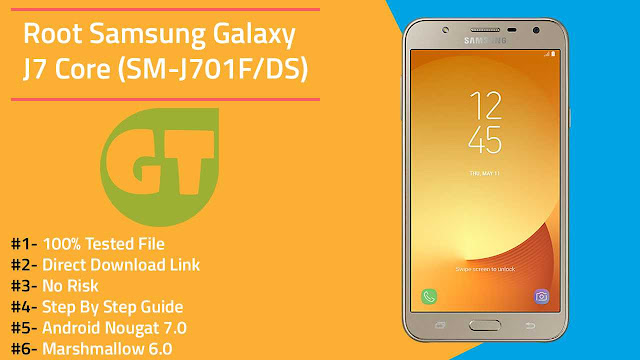
On this post, You will find Link to Download Samsung J7 Core (SM-J701F/DS) Nougat 7.0 Root File. Also, you will get How-to Manual for rooting Samsung J7 Core (SM-J701F/DS) Nougat 7.0.
Samsung J7 Core (SM-J701F/DS) Nougat 7.0 Root & Unlock
Samsung J7 Core (SM-J701F/DS) comes with the latest Version of Android 7.0 Nougat. While rooting Android Nougat is a bit hard and risky but without rooting, it is impossible to Unlock Samsung J7 Core (SM-J701F/DS).
Warning! However, files that we provide on this website are 100% tested. We are not responsible for any kind of Data Loss, Damage & Bricked Phone. Do it at your Own Risk.
Before going to rooting process Please back up important your data and Enable OEM Unlock.

Steps To Enabling OEM Unlock

Go to Settings-About Device-Software Information and tap Build Number for more than 7 times until Developer Options is enabled message pop up. Then go to developer options and enable OEM Unlock and USB debugging.

How To Root Samsung J7 Core (SM-J701F/DS) Nougat 7.0

This root file even works on Android 6.0 Marshmello.
Step #1- Download CF-Auto-Root-j7xelte-j7xeltexx-smj710f.zip & extract it in your pc.
Step #2- Now turn off your Samsung Galaxy SM-J701F/DS and boot it into Download Mode. Press and hold "Volume Down" + "Home Button" + "Power Button" same time and release it when the blue screen appears. Again press "Volume Up" button. Now you will see Blue screen with the exclamation sign.
Step #3- Launch Odin3-v3.10.6.exe as administrator and connect your Samsung Galaxy SM-J701F/DS to your PC using Micro USB Cable.
Step #4- Once your device is detected ID:COM port will highlight blue and you will get Added!! message in the log window as shown in the picture below.
Blue Highlight & Added!! Message on Odin
Blue Highlight & Added!! Message on Odin
Step #5- Click AP button and select CF-Auto-Root-j7xelte-j7xeltexx-smj710f.tar.md5 file that you've downloaded.
Step #6- Now click the Start button. As soon as the flashing finish your Galaxy J701F/DS will start rooting process and reboot into normal mode.
Step #7- Done! First boot will take time to boot just be patient.

CF-Auto-Root-j7xelte-j7xeltexx-smj710f.zip

Final Words

So above was step by step guide on How to root your Galaxy J701F/DS without downgrading firmware. If you have any kind of problem during the process. Then, Feel free to share your problems & Opinions via discussion box below, and don't forget to share this on social networks if you find it helpful.
Learn GSM Tips, Fix Software Issue, Tutorials and Guides To Solve GSM Problems.
On this post, You will find Link to Download Miracle Box V2.27A Full Crack Setup. Also, you will get How-to Manual for installing Miracle Box V2.27A Dongle Full Crack Setup properly on your PC.
Download Miracle Box V2.27A Full Crack Setup
Miracle Box is a tool officially developed for Chinese Phones based on. Fuzzy Logic Miracle Box users can perform many tasks as the service provided by Miracle Box like Flashing, Unlocking, IMEI Repairing on MTK, SPD, Samsung Phones. Sadly it cost $120-$170 Approx.
If you don't wish to buy here is Latest Miracle Box Crack Without Box. 

Miracle Box V2.27A Features:

Here I Have only listed Some Main Features of Miracle Box V2.27A Latest Crack Without Box. Miracle Box Have lots of features if you want to know about them then you should visit its Official website.
#1- ROM Flashing on MTK, SPD, SAMSUNG Mobiles.
#2- Latest Coolsand & RDA CUP Support.
#3- IMEI Repair With Fuzzy Logic.
#4- Root Android Devices.
#5- ROM Backup.

How To Download & Install Miracle Box V2.27A Full Crack Setup


Download Miracle Box V2.27A Full Crack Setup 2017 - Download Miracle Box V2.27A Full Crack Setup Without HWID. Get the direct link to download Miracle Box V2.27A Full Crack Setup 100% Tested Without Password.
Step #1-  Download Latest Miracle Box V2.27A Full Crack Setup From the link below.
Step #2- After downloading simply open Miracle Box V2.27A Full Crack Setup.exe
Step #3- Now, You will be prompted to enter the Installation Password. Enter "CODE-X" as installation password Without quotes. Installation Will start.
Step #4- Boom! You Have successfully Download & Installed Miracle Box V2.27A Crack on your PC. Now simply go to desktop and Launch "Miracle Eagle Eye 2.27a Final".

Final Words: So above article was all about How To Download & Install Latest Miracle Box Crack Setup. If you have any kind of problem during Installation process please let us know by commenting down. Please Do Share!